Guides
Table of Contents
Operation
Device Charging
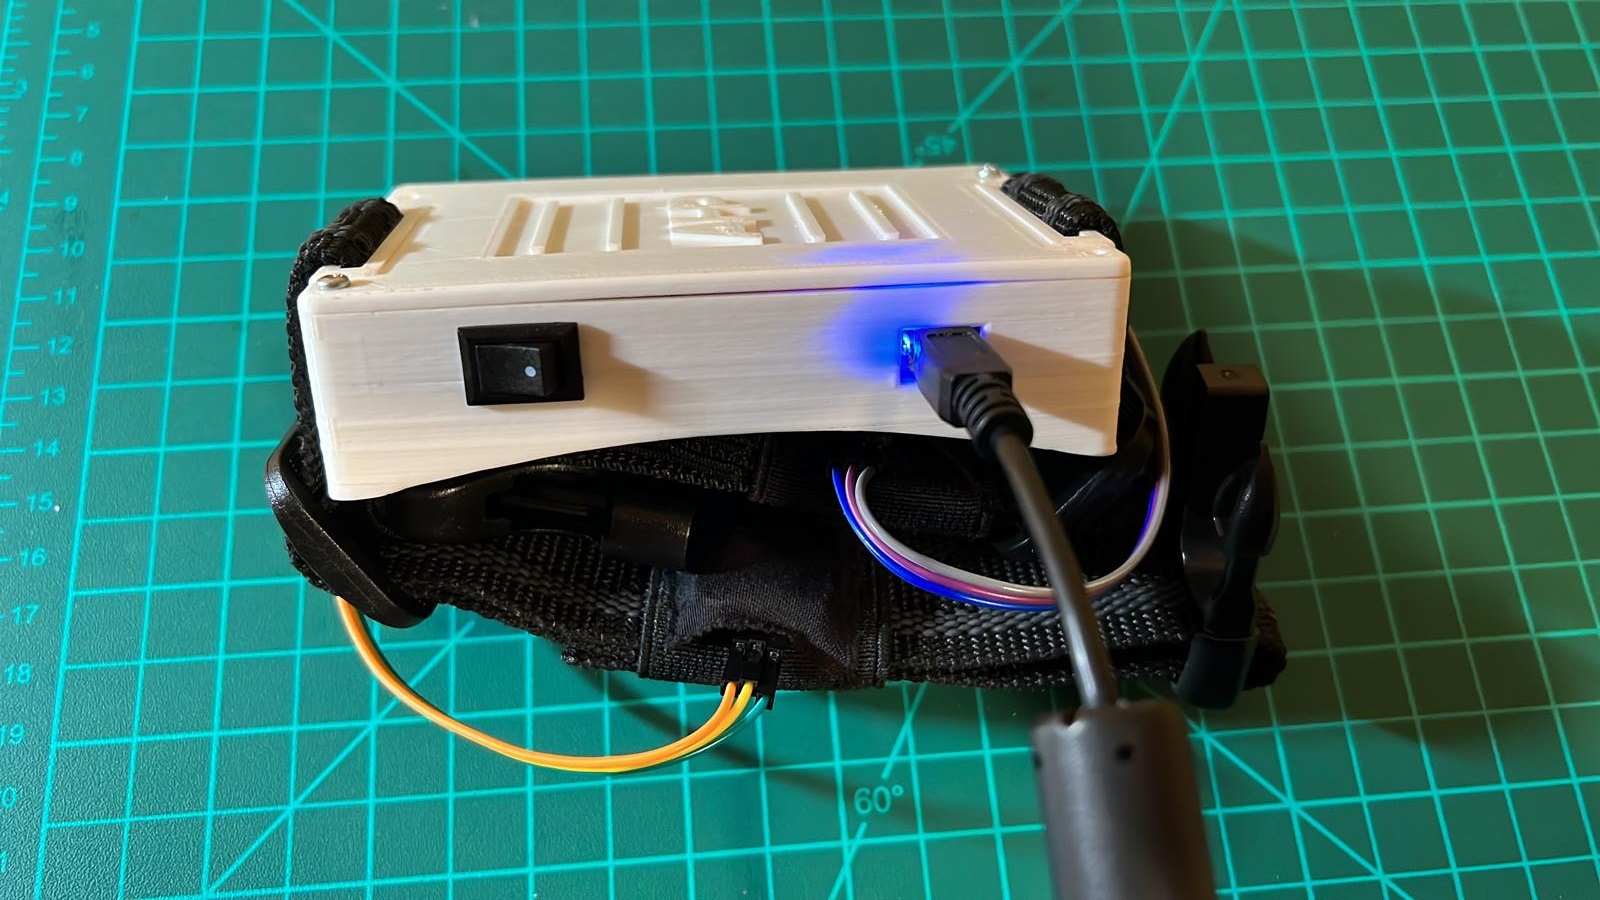
- To charge the At Home Physio (AHP) motion analysis device, a micro B usb connected to a charging block that is plugged into a wall outlet must be inserted into the charging port located on the front side of the device housing.
- Once plugged in a blue light will then light up on the spark fun charger booster circuit (the red board). This light is visible through the porthole. (See Figure 1)
- The charge time of the device is approximately 30-40 minutes. This is due to the lithium polymer (LiPo) batter within the device. Thus a user should set a timer within that range and unplug the device once the timer elapses. Over charging a LiPo battery can damage it and reduce its longevity. Or in a worse case scenario leaving the battery plugged in for too long can cause the battery to combust.
- It is important to note the device only needs to be charged once a week. A rehabilitative exercise routine only lasts between 10-20 minutes.
- The lifespan of a LiPo battery is approximately 100-300 full charge cycles. If maintained properly a battery can last upwards of two years.
- It is recommended that when charging the device a person is nearby to monitor the charging process. This allows one to make sure that one the device is charging and two ensure that the battery is still healthy. If the charge light turns off or smoke appears, unplug the device from the wall and wait 30 minutes before removing the lid and checking the battery.
- If the battery is damaged or “puffy” DO NOT USE THIS BATTERY. At this point you need to replace the LiPo battery with a new one. It is recommended that the battery be checked every month to ensure it is still in good condition.
Device Setup
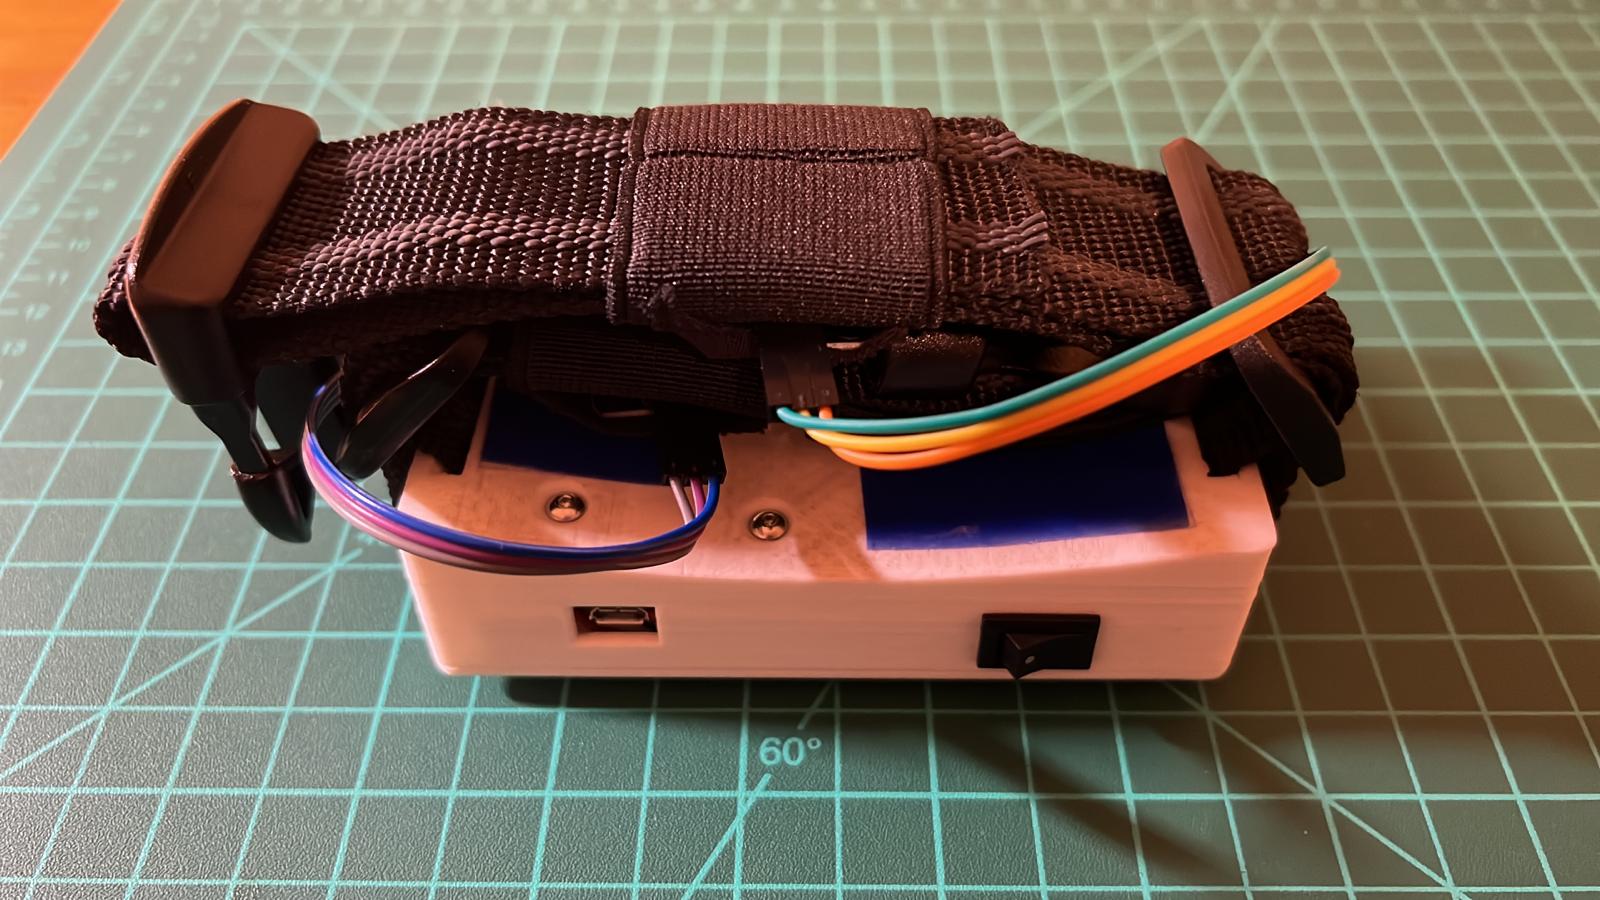
- To use the At Home Physio one must first place the device at rest on a flat surface to set its orientation. It is best to place the device cover side down for the best results (See Figure 2).
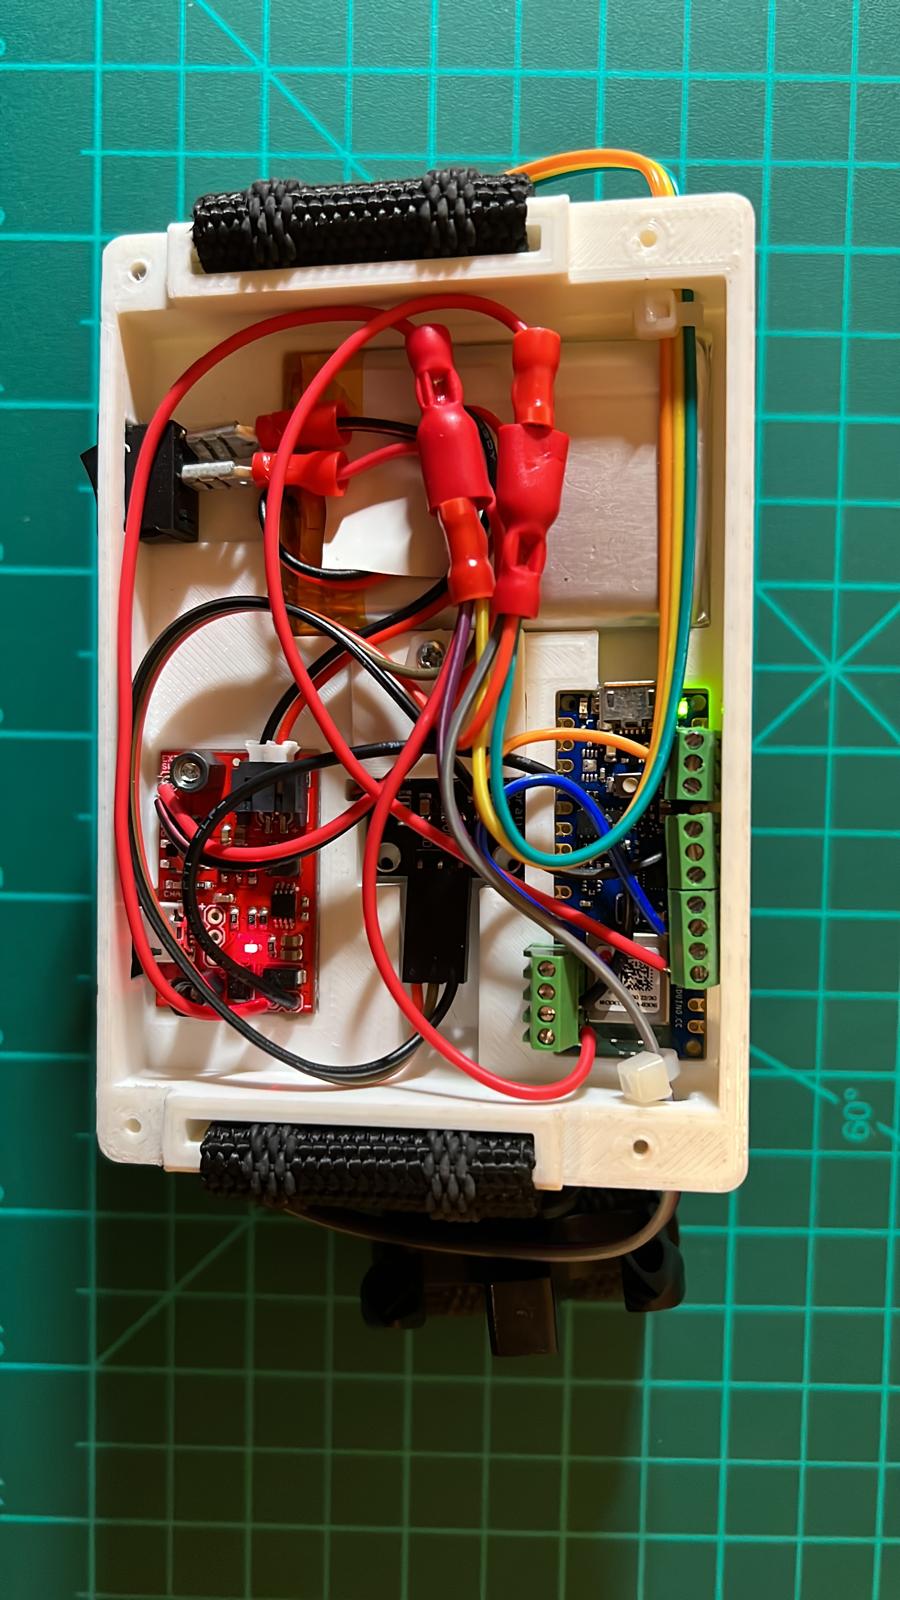
- The AHP device can then be turned on by manipulating the switch to its “on” position rather than the “off” position. A user will know the device is on by peering into the charging port and see a red light present on the spark fun charger booster board and a yellow light in the back of the device from the Arduino BLE 33 nano microcontroller (see Figure 3).
- When the device is powered on it is advised that it is left at rest for approximately 30 seconds to allow it to warm up and orient itself in space.
- Once the 30 seconds has elapsed the user can then pick up the AHP and attach it to themselves.
- The device is best attached to an individual when sitting down to avoid any chance of someone falling over when attempting to attach the band to their person.
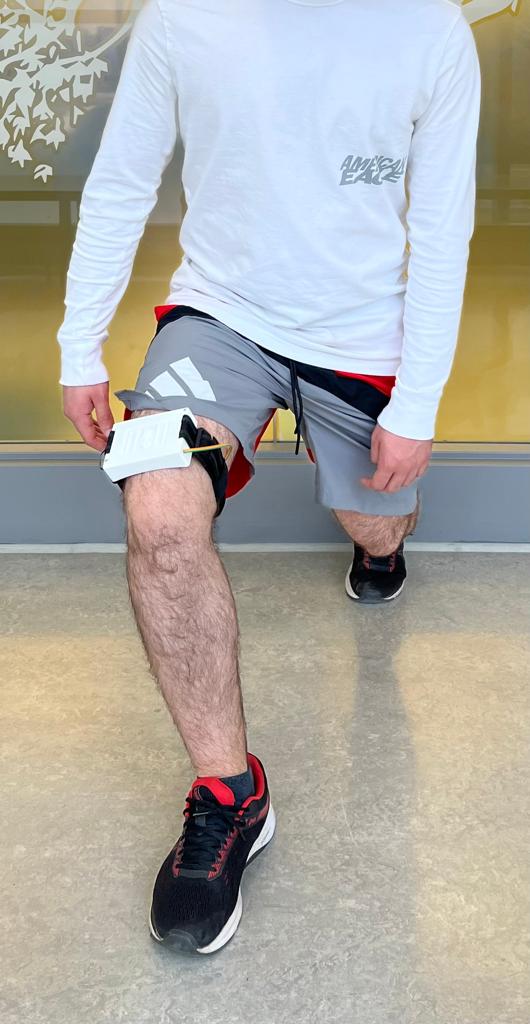
- To attach the device to a person, the device should be placed right above the knee on the lowermost portion of their thigh. The leg the device is attached to is the dominant or lead leg of the exercise. For example, for a forward lung the AHP will be placed on the lead leg.
- The device has a concave shape to aid the placement of the AHP on a user. The AHP is meant to be worn with the power switch and charging port facing upwards (towards the sky when one stands up vertically). Doing so ensures the IMU 9-axis sensor is oriented in the right position and it is in the best position to provide haptic feedback
- Additionally, this orientation allows the user to easily access the power switch.
- Once the AHP device is placed in the correct position above one's knee it can be strapped onto their leg using the canvas straps. The straps can be adjusted as one feels fit in order to ensure a tight fit.
App Use
- To use the device one must first ensure that bluetooth is enabled on their cellular device.
- Then using the android application on one's phone the user must login (if an account has already been registered) in order to access their rehabilitative exercise routine.
- The user will then select the Connect icon shown on the screen to link the AHP to their phone.
- To select a particular exercise the user will select the Exercise button to access the feedback function of the AHP and select rehabilitative exercises in accordance to the routines provided to them through the app via their physiotherapist.
- The user should then assume the starting position of their selected exercise. Once in the proper position they can click the Start Collection button.
- Once the user has completed their exercises they will end their session by pressing the End Collection button.
- When data collection has ended they are free to disconnect the device from their phone using the Disconnect function on the App. The user can then turn off the device using the switch. They can then remove the device from their leg and place it in a safe storage location.
Exercises
DISCLAIMER:The accuracy of one's technique when performing an rehabilitative exercise of any kind is subject to change based on how far along they may be in their rehabilitation. These exercise guides are explanations describing the most ideal technique of a particular exercise in which patients should work towards. However, one should avoid going beyond the scope of their rehabilitation and should follow their physiotherapists instructions.
Lunge
- To perform a forward lunge one must first orient themselves in the appropriate starting position.
- To take up this position one will begin by standing with their feet, shoulders width apart.
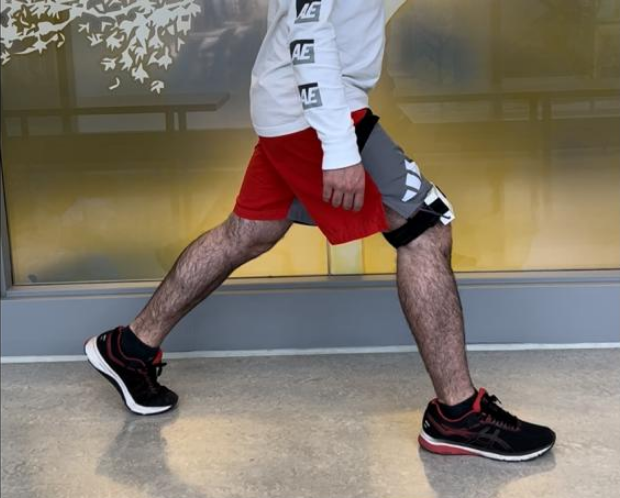
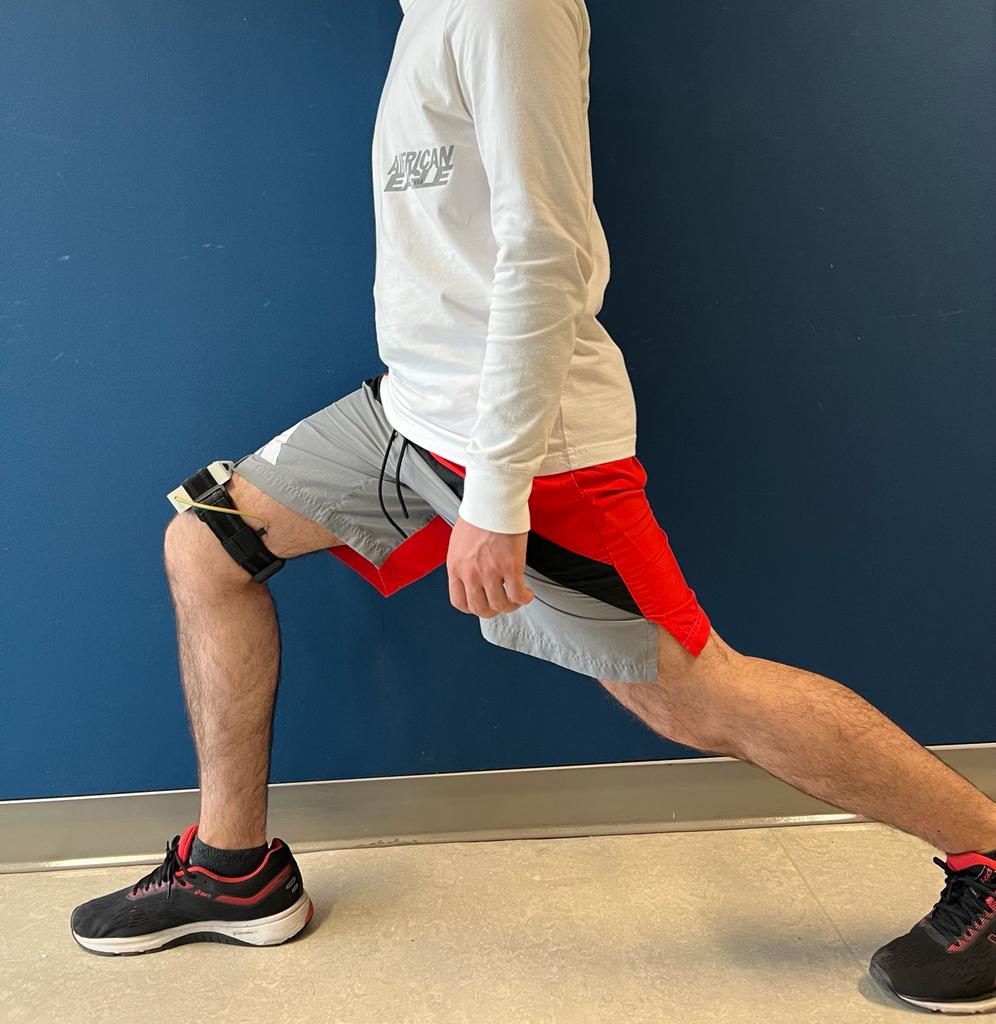
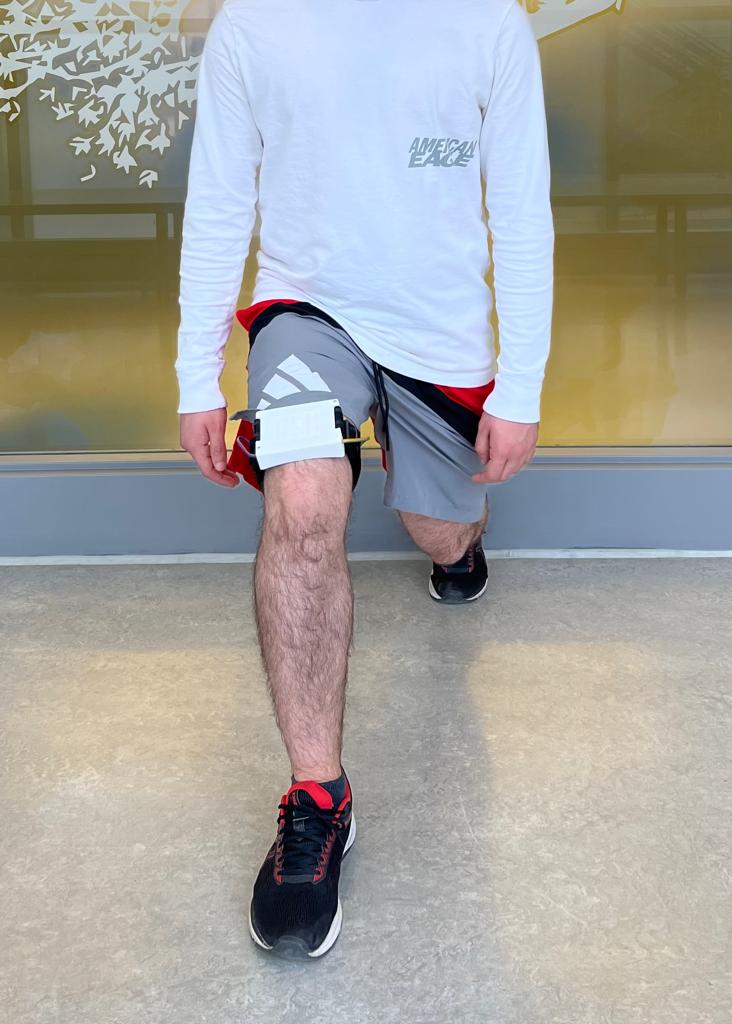
- The patient must then take a step forward with their lead (leg with the AHP) leg aligning their ankle, knee and hip.
- One's back leg will have heel raised with their toes pointed forward (see Figure 4)
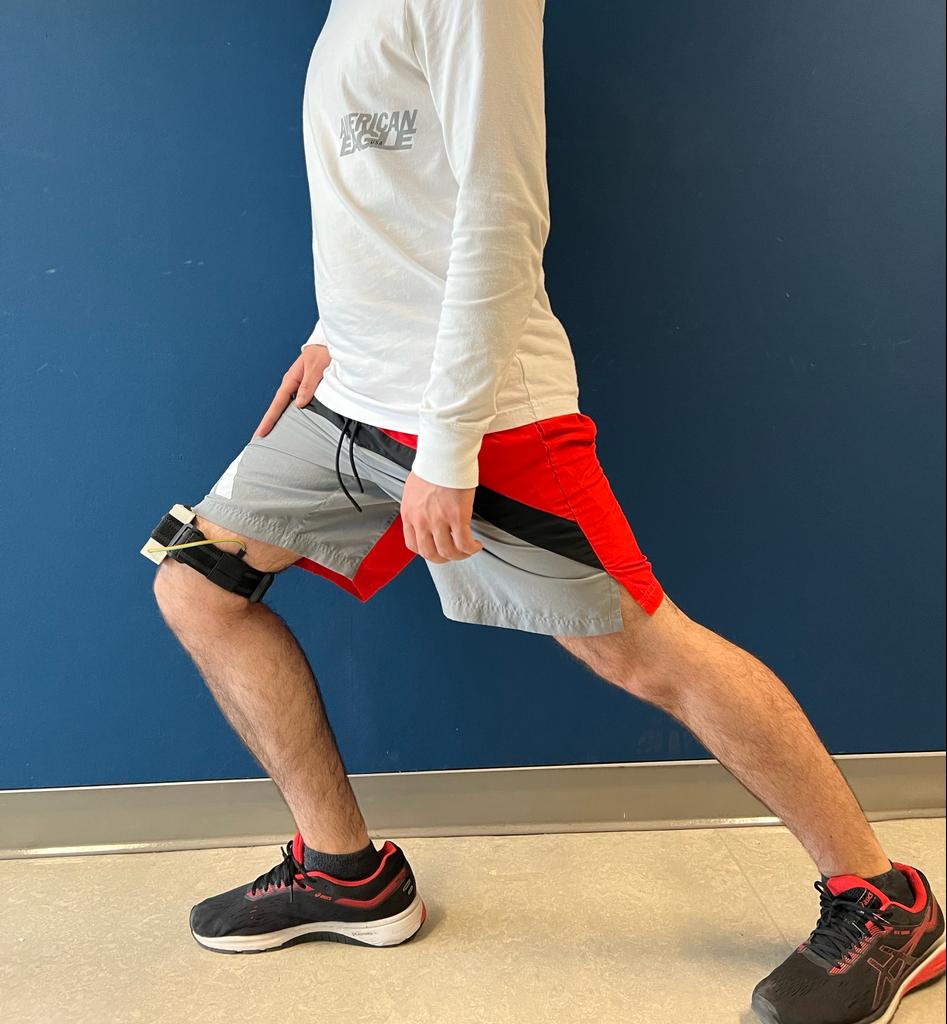
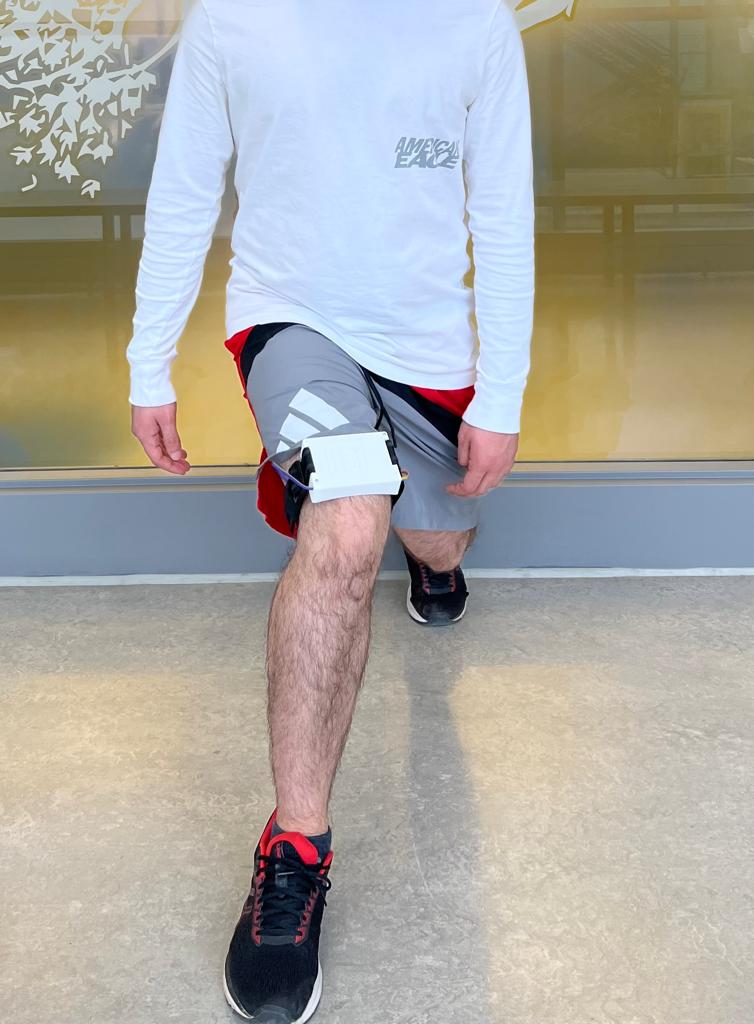
- Once the user has taken up the starting position they are free to begin the exercise. This is done by lowering one's body downwards and bending their lead legs knee to 90 degree angle. It is crucial that they maintain proper alignment throughout their lower extremities to make sure they are doing the exercise correctly (see Figures 5-6).
- After one's body has been lowered to achieve the 90 degree angle in their knee the individual can rise returning to the original start position.
Below is a video of an ideal set of lunges
BACK TO TOP